This page intentionally left blank. ⬇️, ➡️, or spacebar 🛰 to start slidedeck. --- class: middle, center # Git (on GitHub), or Git100 --- # Hello This is a high-level introduction to git used on GitHub, using only the website. It is sort of like a "fake it 'til you make it" introduction and is intended for brand-new beginners. Please see my [follow-up slidedeck](/presentations/git.html) on using git on the command line for more in-depth and everyday usage of git. --- # First, what is git? *Git is a version control system for tracking changes in computer files and coordinating work on those files among multiple people. It is primarily used for source code management in software development, but it can be used to keep track of changes in any set of files. As a distributed revision control system it is aimed at speed, data integrity, and support for distributed, non-linear workflows.* (Definition straight from [Wikipedia](https://en.wikipedia.org/wiki/Git)) --- # Git or GitHub? Git is the program installed on your computer that handles 'version control.' GitHub is a company that uses Git to host and share information. It's literally a *hub* for *Git* repositories. Alternatives to GitHub are [GitLab](https://about.gitlab.com/), [BitBucket](https://bitbucket.org/), or locally-hosted systems. --- # Hello again I think a lot of people are intuitively intimidated by using git because it can be hard to understand or because they don’t know how to read code. But not being able to read code is okay because you can still make valuable contributions in human languages like English! One of the biggest sore spots for most open source software (and even proprietary software) is a lack of clear, concise documentation. But at least with OSS, if something in the documentation is confusing, you can actually go in there and CHANGE it. Or at least make a request to change it. I’m gonna go through how you might make those changes without having to do anything “techy.” --- #### Example GitHub Repository .center[] --- #### Example GitHub Repository: Issues .center[] --- # Complain (aka File an Issue) The easiest way to participate on GitHub-based projects is opening up an Issue. This is the same as filling out a form explaining your problem. Some projects have guidelines as to how to file a proper Issue, especially if they use it for bug reporting. It's important to follow those rules when they are available, or your concerns might get ignored! --- # Edit a document GitHub works like this: First, you do something. Then, you ask if that was OK to do. It's a real "better to ask for forgiveness, not for permission" situation. This is why we are going to first edit a document, and then we ask if that change was OK and if it can be accepted into the main repository. --- # Edit a document Let's walk through editing the README.md. The main block of text on the front of a Github repository is located in the README.md file (or something similar), but you can't attempt to edit it from the main page. You have to click on the file first. --- #### Example GitHub Repository: README .center[] --- # Edit a document When you are on a file's page, you can click the pencil button in the top right-hand area to edit the page. .center[] --- # Edit a document Editing works like any web-based editor. You can make changes and even preview them. It will show in red things that you deleted and in green things that you added. When satisfied, go to the bottom of the page! .center[] --- # You made a commit! Congrats! You have made a commit. Well, almost! If this was your own repository, you'd be pretty much done by this point. But since we are changing a shared repository, there are a few more steps involved. --- # Request changes (propose a commit) We made a change and we are ready to save our work, but GitHub stops us. Why? We have to propose a change first! .center[] --- # Request change (making a commit) ### The seven rules of a great Git commit message 1. Separate subject from body with a blank line 1. Limit the subject line to 50 characters 1. Capitalize the subject line 1. Do not end the subject line with a period 1. Use the imperative mood in the subject line 1. Wrap the body at 72 characters 1. Use the body to explain what and why vs. how This is from an overall great guide to how to craft beautiful commit messages for others and for your future self. [Here!](https://chris.beams.io/posts/git-commit/) --- # Request changes (a note on etiquette) Unless the repository belongs to you or you have been granted administrative access, you cannot directly edit a file on the main repository. This is for a good reason and it protects not only the primary repository, but also keeps everyone working on the project in alignment with each other, and it helps keep changes everyone is making on track and of good quality. Also, to commit work directly to main without asking anyone else to look it over first is considered an arrogant move, and seen as gauche. Don't do it even if you can, if working with a group! --- # Request changes (comparing) On the next page, you see a review of your changes and how they compare to the original. If something is wrong, you'll see it here first. The example looks OK, so we can open up a "pull request". .center[] --- # Pull Request ### A pull request is you asking to have your changes "pulled" into the main repository. --- #### Example GitHub Repository: Pull Requests (open) .center[] --- # My repo, your repo, our repo When doing something like above, which is asking a repository you are not involved with to add some code to it, it will automatically call your request "patch-1" and let you submit your change request. These pages can look a little different if you are working in your own repository or if you have administrative access to a repository. See the following screenshots for how it looks a little different. --- #### Example GitHub Repository: Pull Requests (proposing) .center[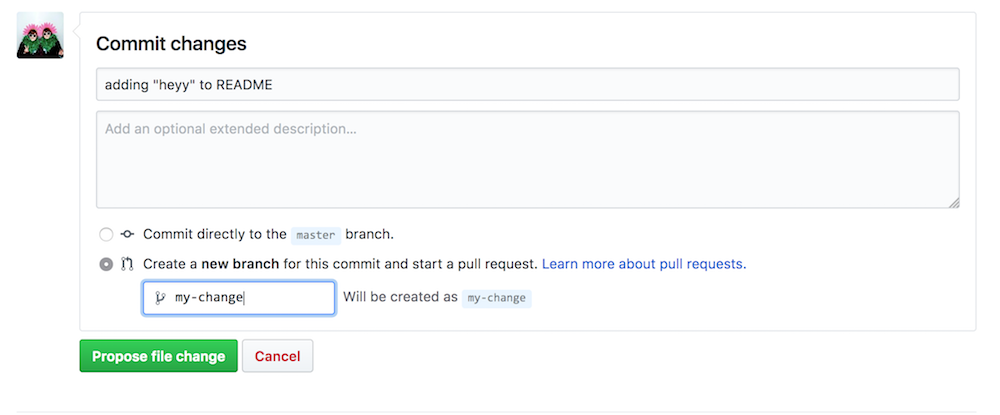] --- #### Example GitHub Repository: Pull Requests (opening) .center[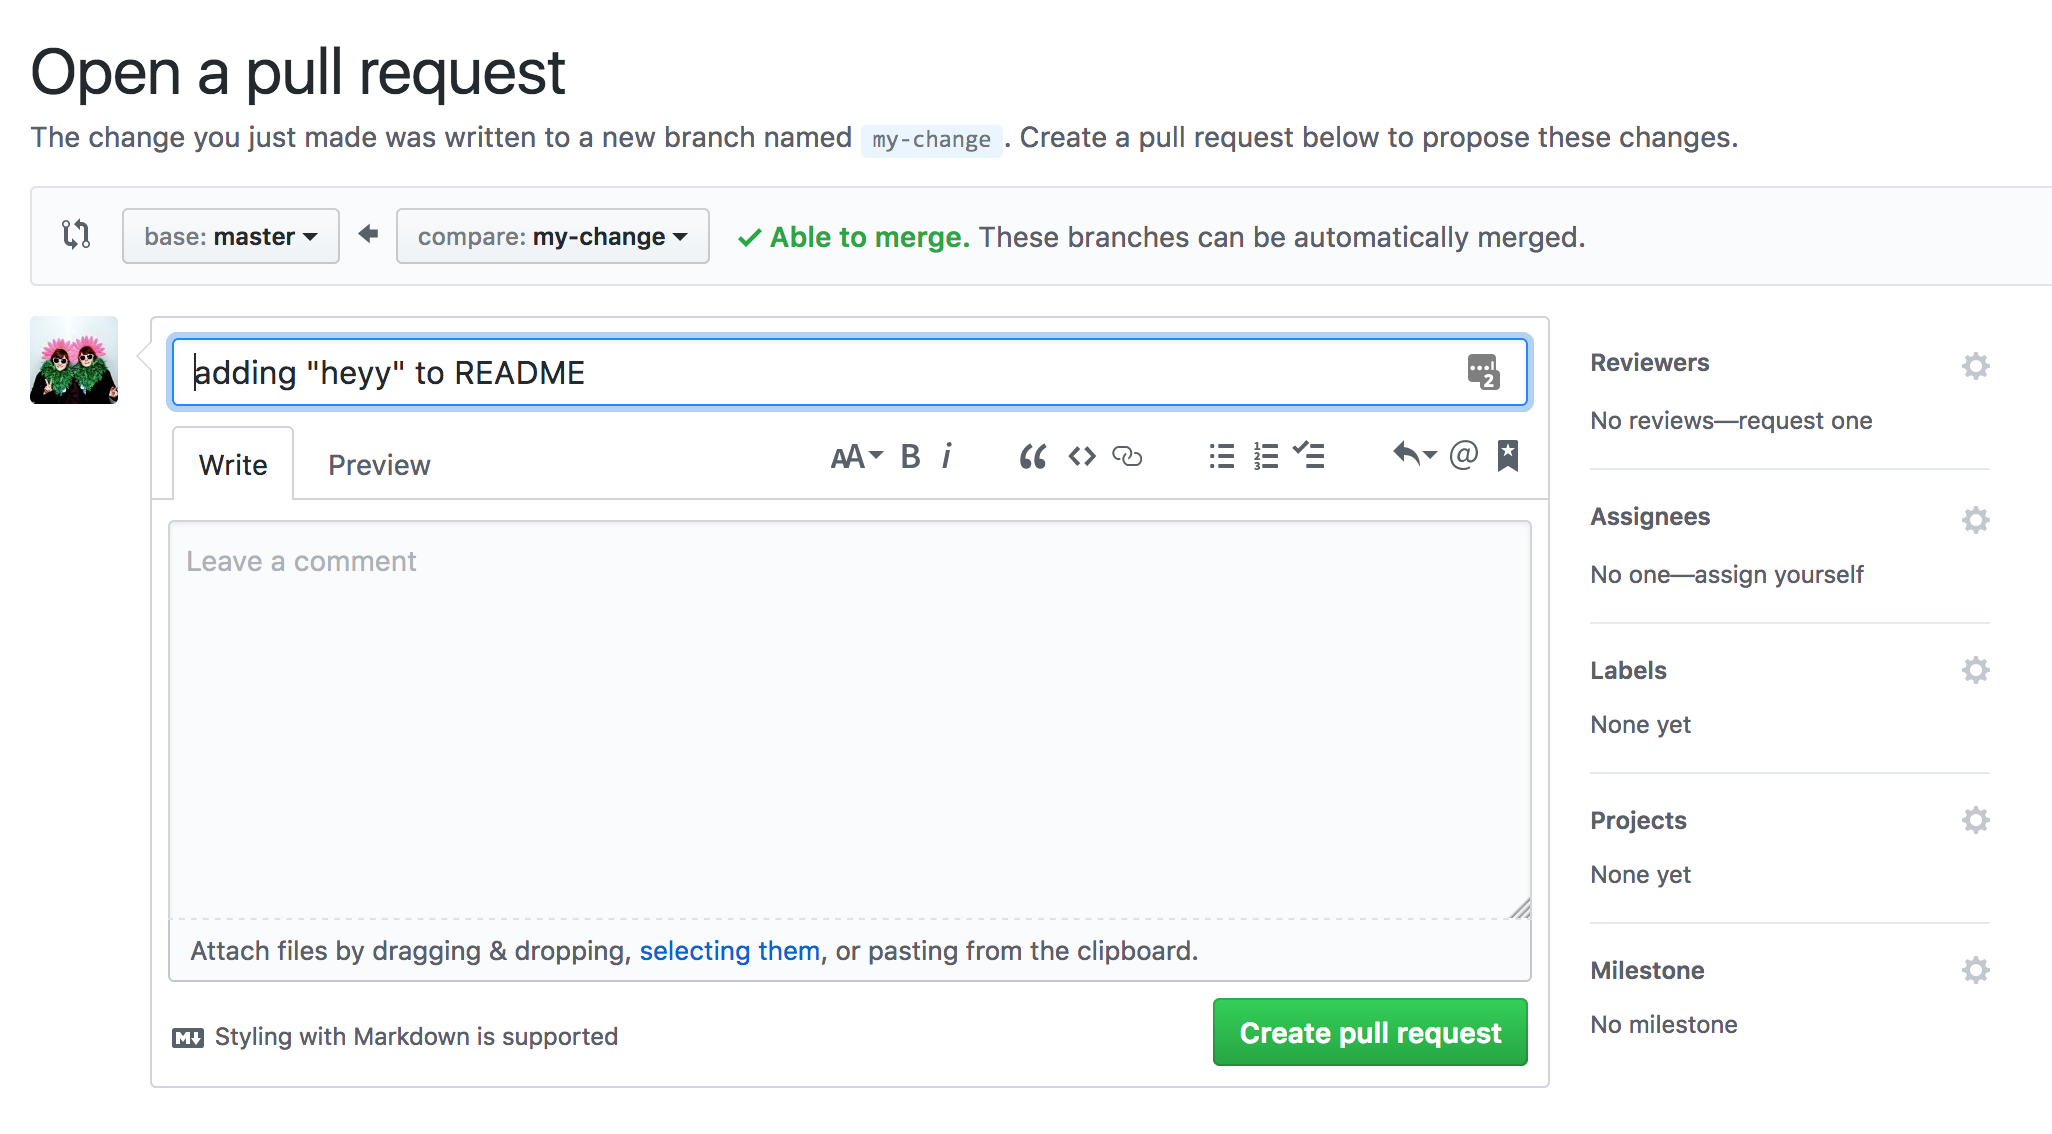] --- #### Example GitHub Repository: Pull Requests (review page) .center[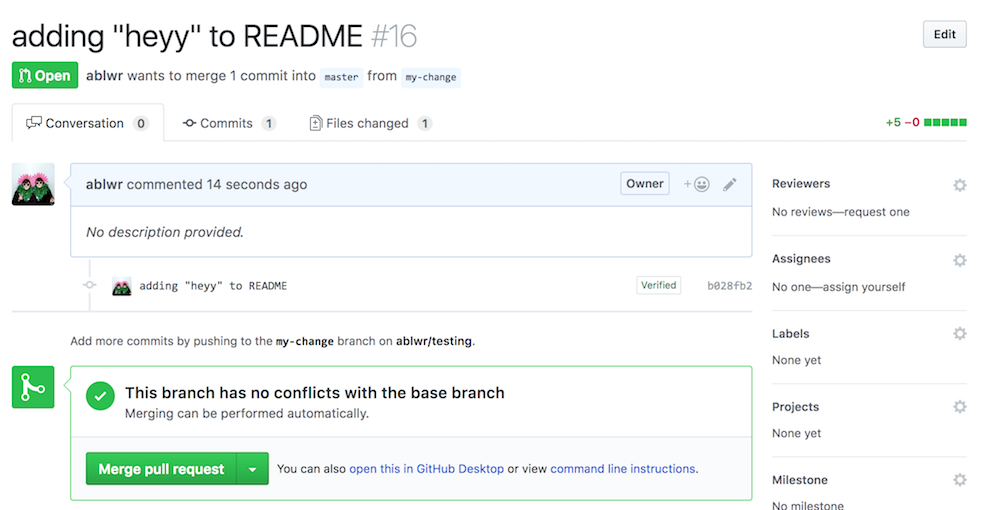] --- # Conflict! Sometimes, things don't go so well as above. If you and someone else make a change on the same line, you might get a conflict alert and you have to resolve it before you can proceed. Fortunately, GitHub finally allowed this to be resolved on the WebUI. Formerly, this could only be resolved by using the command line. This is where you have the power to make changes and decide which line stays or which line goes. --- #### Example GitHub Repository: Pull Requests (conflict) .center[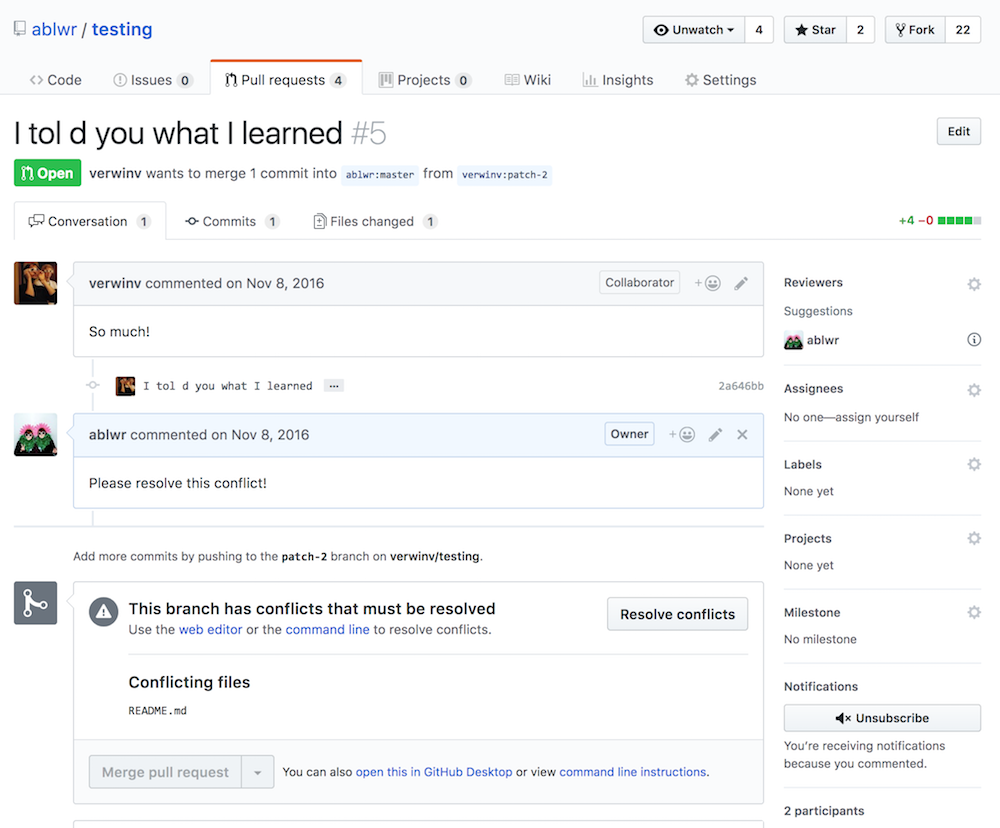] --- #### Example GitHub Repository: Pull Requests (conflict resolving) .center[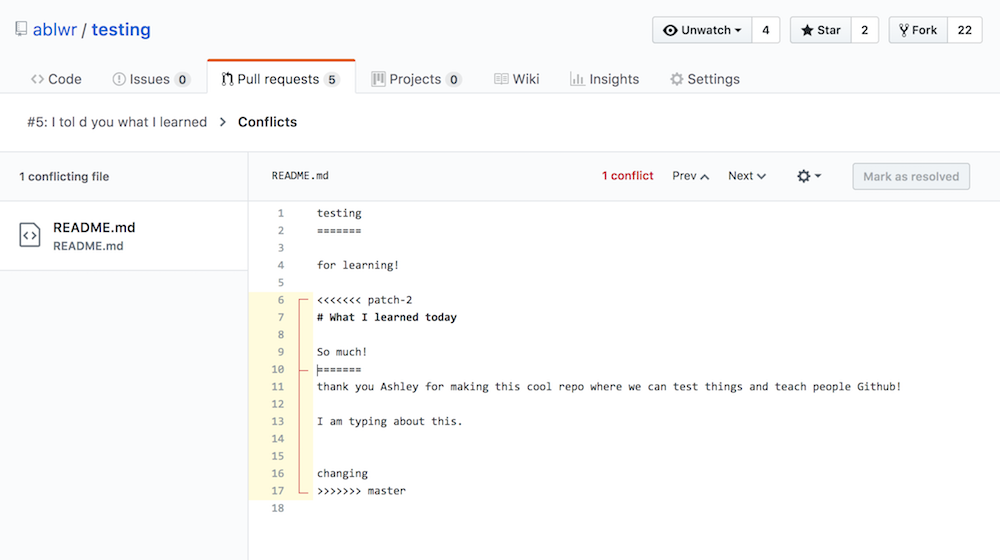] --- #### Example GitHub Repository: Pull Requests (conflict resolving) .center[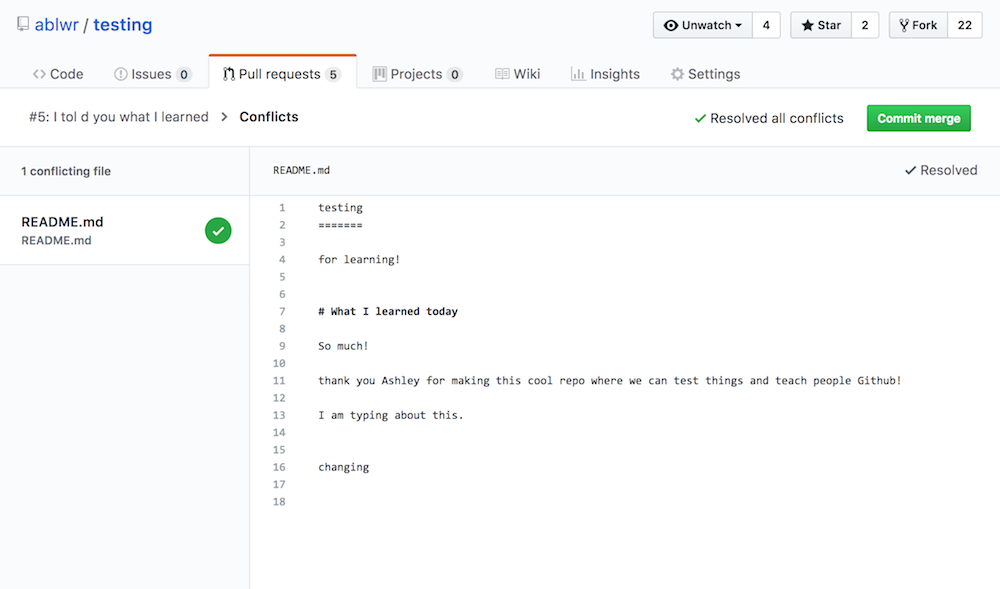] --- #### Example GitHub Repository: Pull Requests (conflict resolving) .center[] --- # Conflict ⚠️ When the conflict has been resolved, like above, a merge commit is made and the pull request can be again reviewed and merged into the repository. --- #### Example GitHub Repository: Pull Requests (on main page) .center[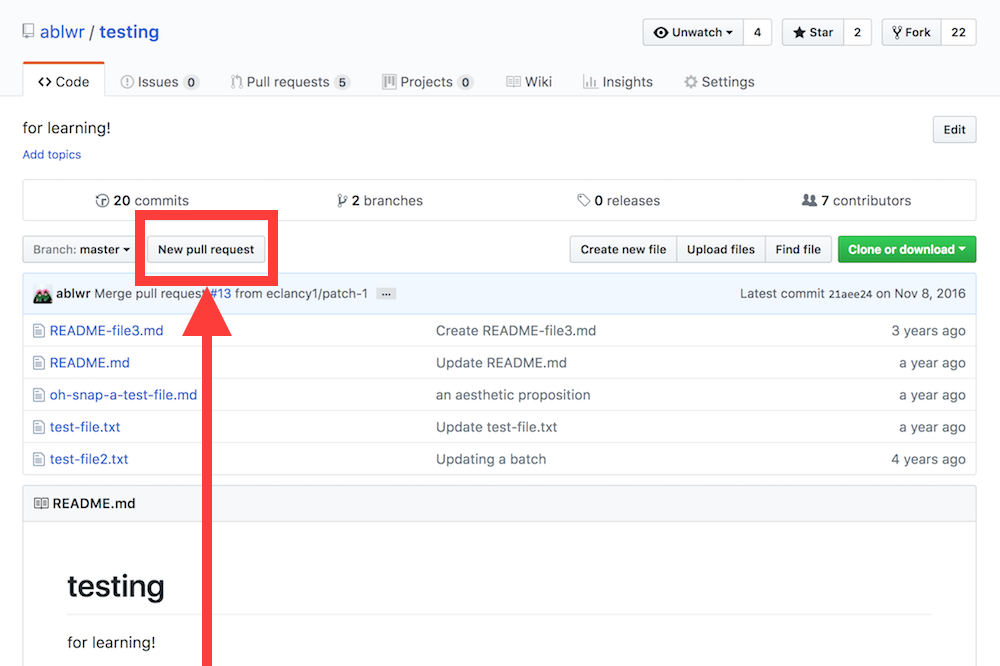] --- # Branches and Forking "Branches" are different versions of a repository within the same repository. The default branch is the `main` branch, but that can be changed. When performing the above tasks, you are first **forking** the repository (making a copy that is your own, like a very big copy-and-paste) and then you are making a new **branch** (called patch-1 by default) in *your* copy of the repository. When you make a pull request, you are asking the main repository and main branch (or maybe another one) to accept the code you made in your repository in the new branch you made. If that sounds confusing -- it is. For simple tasks, it's just important to send your pull request to the right branch. If you are confused or make a mistake, it is okay because someone will let you know and you can change it. ☺️ --- #### Example GitHub Repository: Branches .center[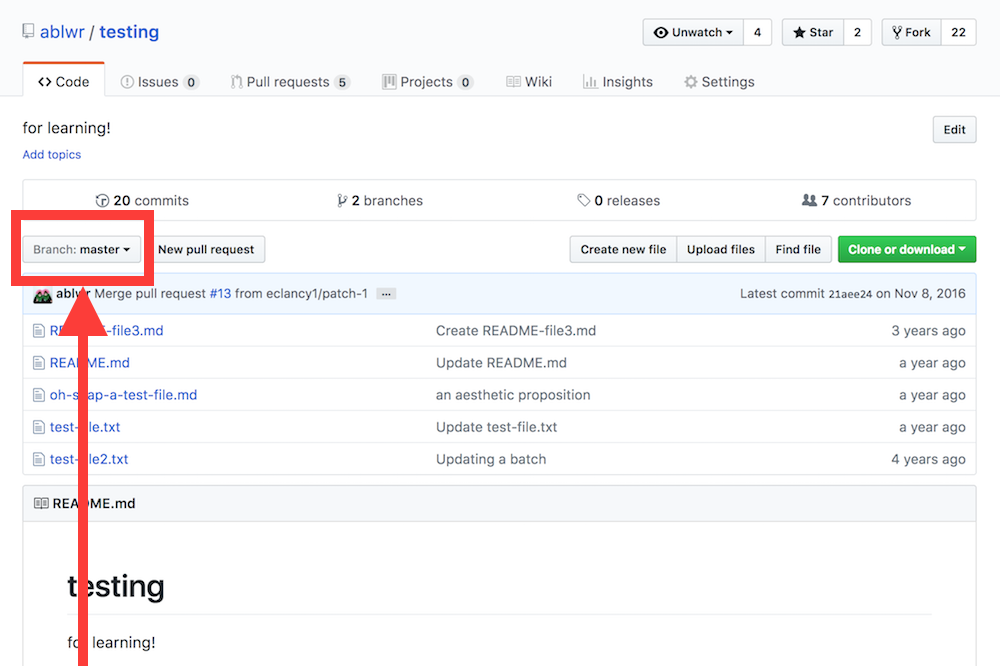] --- #### Example GitHub Repository: Forking .center[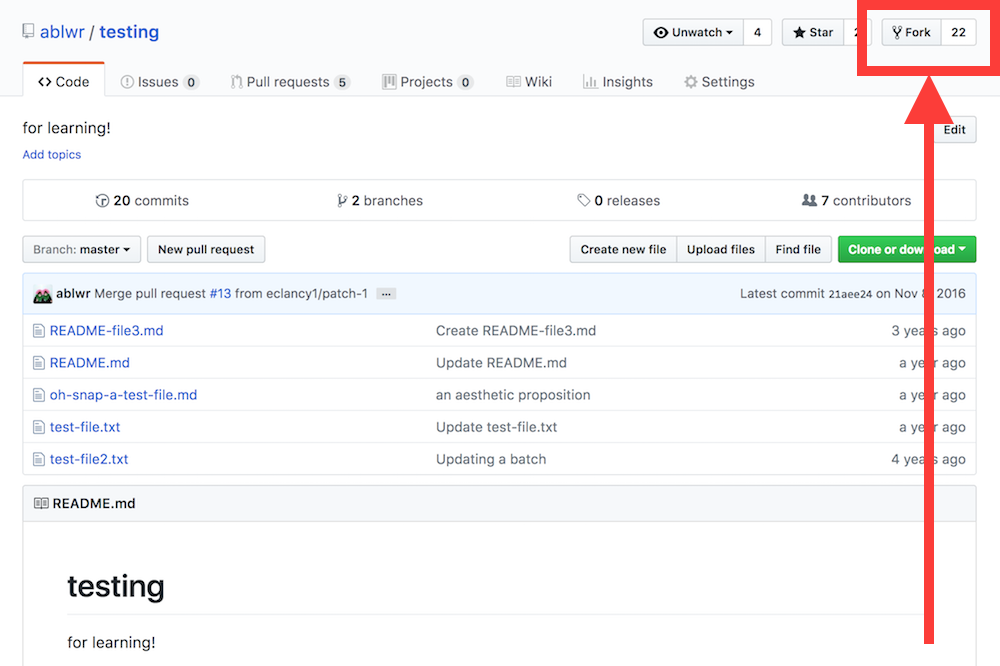] --- #### Example GitHub Repository: New Repository .center[] .center[] --- # Demo [Demo from Open Preservation Foundation!](https://www.youtube.com/watch?v=EpAjEYkyGAc) --- # A final note One thing that guides to Github or Open Source contribution usually fail to mention is that it’s scary. It’s SCARY, dude. It involves being assertive, telling a total stranger that you think you have a better solution to their problem, and invoking feedback from anyone in the world that cares about the project. I don’t have much advice for this other than BE BRAVE, close your eyes, and CLICK that button (or buttons) and don’t worry if someone wants to try to get into a fight with you on the internet. The worst thing that can happen is that you’re wrong, and that’s okay too. And most people are exceptionally nice and willing to work it out with you. # ✨ Don't worry about making mistakes! ✨ --- ## Additional Resources Some material self-plagiarized and updated from [Non-technical person's guide to becoming an open source software contributor via Github](https://ablwr.github.io/blog/2014/11/03/non-technical-persons-guide-to-becoming-an-open-source-software-contributor-via-github/). - [Learning GitHub (or, if I can do it, you can too!)](https://privatezero.github.io/weaverblog/2016/10/13/Learning-Github.html) - [Pro Git Book](https://git-scm.com/book/en/v2) - [Git Cheat Sheet](https://services.github.com/on-demand/downloads/github-git-cheat-sheet.pdf) --- ## Learning more - [Git101](/presentations/git.html) [Home](/)